
Friday, December 21, 2012
Personalized Godparents Gift
I love all those letter photos that spell a last name or a special word. I tried to order from etsy but I couldn't get it personalized the way I wanted. So, what do I do? I make it myself. Thanks to Leo Reynolds and his flickr photo collection of hundreds and hundreds of letters and numbers, I have a gift I love! Hopefully Olivia's godparents will love it too.
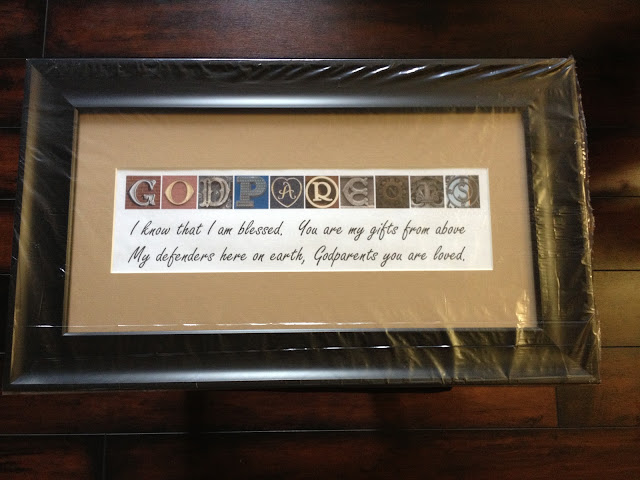
I have made these in the past but I actually took the pics (and I'm not that good to be honest) or bought pics (expensive) of letters and put them in a mat that had openings for each one. This way is not much easier but it does look great and I love being able to add the wording. First you have to find just the right letter, which for me took for.e.ver! Then I just copied and pasted into publisher. You can pick any size template or make your own. I like using the standard sizes so they are easier (and cheaper) to print. You don't have to save all the pics to your computer~ unless you want to. I opened the pic up (large) before copying. It can get kinda blurry when you print if you copy from the smaller sizes. I arranged them in a line then put text underneath it. I ended up adding 2 text boxes so I could put the lines closer together. I had the idea to just cut a mat with 3 openings and cover the mat in burlap. I didn't really have time so I had to have one cut at HL. Guess what! It only cost $4.80. The frame was my biggest expense. It had a mat with 3-5x7 openings. It's a pretty nice frame but it was half off. You could definitely do it for less than I did if you give yourself more time. If you're interested in the file I could email it to you. I couldn't figure out how to post it here. I used a 11x16 template and it only cost $0.99 to print in color at Staples! I love that place!!! Do you prefer black and white? only $0.20. Use card stock to print for better quality. Let me know what you think.
Thursday, December 20, 2012
On the 7th day of Christmas...
I had some people ask to see my 7th day project. I just took a piece of 12" scapbook paper and cut it to 8x12. I folded it in 1.5" pieces accordion style. I used packing tape that is super clear and strong to attach ribbon onto the paper and onto a little circle. One side says 7 things and the other side says pull. I attached it to the visor with scotch tape so it would pull down easily without pulling it all the way down. I took the pics at night with my phone so they aren't the best quality. This isn't one of my greatest crafts (which is why I didn't post pics before) but the message is what matters, right?


Wednesday, December 19, 2012
12 Days of Christmas (1-8)
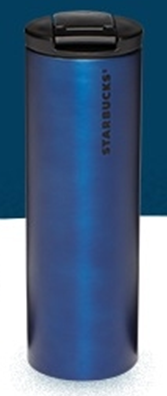 Well, it's day 7 of Nic's 12 days of Christmas and he is loving it! I mean who doesn't love getting gifts every single day, right? Day 7 was his favorite (and probably mine too) but here's a little recap of his gifts. First was this awesome coffee tumbler from Starbucks. He says it works a little too well... keeps his coffee piping hot for hours! On the second day he got 2 pair of cycling socks. I'm not sure what makes them cycling socks (except for the price- geez!) but he's really into mountain biking lately so he was excited. On the 3rd day I got him a new blue controller for his PS3 (see what I did there?) It was blue too. That's his favorite color in case you weren't sure.
  On the 4th day I got one of his favorite beers which happens to come in a 4 pack. This is from a brewery called Great Divide. They are out of Colorado and probably Nic's favorite. On the 5th day I gave him a gift certificate for a 5 minute foot massage. If you know me at all you know this is a HUGE gift as I hate feet more than a lot of things! I was struggling to find something for the 11th day so I thought I was going to have to do it then.
 On the 6th day I gave him these cool little ice cubes.
 They are stainless steel and come in a little container to freeze and store them. So, here we are day 7. He is at the fire station today so I thought it would be the perfect opportunity to surprise him. I made this little accordion style card with 7 things I love about him. I pinned it up on his visor with a little tag hanging for him to pull and it would unfold in front of him. He loved it! I think it's so nice just to let your loved ones know just how much they mean to you. We get so busy with life that sometimes we forget to tell them. Telling your husband why you love him or what you love about him makes you both feel special. ok cheesefest over...
  On to day 8! I can't wait!!! I hope he shares. I am giving him this salted caramel hot cocoa that has 8 servings and it is SO good! They also have a toasted marshmallow hot cocoa which I haven't tried yet. It sounds yummy though so, dear Santa, I would love that in my stocking! I think I have been mostly nice. What do ya say? Oh I'd also love a food processor or a terrycloth robe... you know, in case you're wondering.
Thursday, December 13, 2012
It's Christmas time!!!

One thing I really enjoyed doing last year was the 12 days of Christmas with my very own Saint Nic. Yes, I know that I do this backwards, but it's just something fun I like to do. So, today is the first day of Christmas (for my purposes) and the 12th day will be on Christmas Eve. Basically, I give him little gifts that correlate with the number of day it is. Like, today... It's the 1st day of Christmas so he gets one blue steel coffee tumbler and I'm hoping Santa puts the matching gold one in my stocking (wink, wink!) Tomorrow he might get 2 of something. The trick is surprising him with it. So, I have to sneak around after he goes to bed or before he gets up... kinda like that dang elf! I have a big HESI exam this morning so I won't get to see his reaction but I'm sure he'll love it. Happy Advent!!!
Wednesday, December 12, 2012
I'm a winner!
I'm baaaaaaaaaack!
No I didn't die... or join a cult that doesn't allow Internet... or drop off the face of the Earth. Oh yeah, I might have done that last one. I am finishing up my last semester of nursing school. I graduate Friday and I couldn't be more excited to get my life back and start spending more time with my friends and family!!! I just wanted to give a quick shout HELLO! and give you a recipe. The weekend before last we went to a chili cook-off and guess whose chili won first prize? That's right... yours truly! I even got an awesome trophy that is displayed with pride right next to our wedding pic!
I meant to take a picture of the chili itself, but it was all gone before I got a chance. That's a sign of a good dish! So here's the recipe for my Champion Chocolate Chili!
 Champion Chocolate Chili
No I didn't die... or join a cult that doesn't allow Internet... or drop off the face of the Earth. Oh yeah, I might have done that last one. I am finishing up my last semester of nursing school. I graduate Friday and I couldn't be more excited to get my life back and start spending more time with my friends and family!!! I just wanted to give a quick shout HELLO! and give you a recipe. The weekend before last we went to a chili cook-off and guess whose chili won first prize? That's right... yours truly! I even got an awesome trophy that is displayed with pride right next to our wedding pic!
I meant to take a picture of the chili itself, but it was all gone before I got a chance. That's a sign of a good dish! So here's the recipe for my Champion Chocolate Chili!

- 1 lb bacon (diced)
- 1 lb spicy Italian sausage
- 1 lb sweet Italian sausage
- 1 large can (29 oz) tomato sauce
- 2 cans of Rotel diced tomatoes with green chilies
- 1 small can of plain diced and peeled tomatoes
- 1 medium white onion (diced)
- 1/4 cup (or less) Sweet Baby Ray's Hickory and brown sugar BBQ sauce (or you could add brown sugar and liquid smoke to taste)
- 1/8-1/4 cup chili powder (depending on the amount of kick you like- I'm a weenie so I used less)
- 1/2 Tbsp Italian seasoning
- 2 cans dark kidney beans
- 2 cans light kidney beans, and finally...
- 2 one-ounce squares of unsweetened bakers chocolate
- In your stockpot combine tomatoes, tomato sauce and Italian seasoning over medium heat.
- Cook bacon until crisp. Then, stir it into the stockpot.
- In the same pan, brown the Italian sausage and stir it into the stockpot.
- Caramelize the diced onion in the same pan and stir it into the stockpot.
- Add BBQ sauce and chili powder to taste. Adjust as necessary.
- Stir in the kidney beans (undrained)
- Stir in the chocolate squares. They take a while to melt so keep stirring.
Friday, May 11, 2012
Mickey Mouse Clubhouse Birthday continued (lots more pics)
So I just shared a lot of my projects from Olivia's 3rd birthday party here but I have a few more... plus a bunch of party pics.
 Here is a pic of my sweet table. I was very ambitious and thought I would make cake pops, a 3D clubhouse, chocolate covered oreos, Mickey shaped cookies with royal icing as well as the number 3 and square ones with Olivia's name. This was a bit ambitious for anyone I think but especially for me since I just had a baby 3 weeks before Olivia's birthday. Well, this is what I got instead. Oreos out of the package, cupcakes, and puppy chow. I also made chocolate chip cookies and I found these adorable Minnie mouse sugar cookies that really didn't turn out anything like what the box looked like ;) It was still a big hit.
 Also big hits were the 18" pixie stix and gourmet lollipops. I'm not sure what makes them gourmet but they went fast! The pixie stix were fun because I added little Mickey labels to the top. The kids were really excited about these but I'm not sure the parents were. I don't know that I would use them again for a party for toddlers... OOPS!

 We had the basic food set up~ Hot dogs, chips and salsa, chex mix, some cheesy stuff. Here is a pic of Nic preparing the "Hot Diggity Dogs" and look at what I did with the hot dog ketchup, mustard and relish bottles.
We also played some games. This was an area I had to scrap too. I had planned on making Minnie's BOW~tique, Goofy's obstacle course, Mickey Pavilion and Pluto's bubble bath. Then I realized that there was not enough time and I didn't have enough "extra" adults to oversee these games.

 So, Minnie's BOW~tique turned into Minnie's BOW~la~rama. We didn't have an organized obstacle course but I still had tons of hula hoops to jump through and some other fun things. I didn't get many pics of that but I did get a couple of Donald's Ducks. You know what else I didn't get many pics of? The birthday girl! She had such a good time and would not sit still long enough. I thought I had a good pic with this one but she ran off!

 This is a pic of her gift table. I made a banner with her name out of glitter paper using my cricut. She loved it because it was so sparkly. I hung it up in her playroom after the party. I made a big cardboard number 3, painted it pink, modge podged and glittered the hell out of it but I totally forgot to hang it up :( I thought I could let someone else use it but then it got ruined outside. Oh well. I had also planned this big Mickey frame using a 10x13 and 2- 5x7 pics cut in circles framed with black glitter paper circles put together like a Mickey Mouse head and maybe even a big bow but it didn't work out. I ran out of time. So what I do with a picture this size?
 I just hung it over the gift table. I didn't want it to go to waste. I mean look at this girl... What a cutie, right?! Her sister is pretty cute too! It was really hot out and she was so new that she was inside for most of the party. She had some cute Minnie mouse ears too. I know someone got a picture of her with them on but I'm not sure who. So, if you have it, please send it my way. Here are some more pics of the party fun!


 Here is a pic of my sweet table. I was very ambitious and thought I would make cake pops, a 3D clubhouse, chocolate covered oreos, Mickey shaped cookies with royal icing as well as the number 3 and square ones with Olivia's name. This was a bit ambitious for anyone I think but especially for me since I just had a baby 3 weeks before Olivia's birthday. Well, this is what I got instead. Oreos out of the package, cupcakes, and puppy chow. I also made chocolate chip cookies and I found these adorable Minnie mouse sugar cookies that really didn't turn out anything like what the box looked like ;) It was still a big hit.
 Also big hits were the 18" pixie stix and gourmet lollipops. I'm not sure what makes them gourmet but they went fast! The pixie stix were fun because I added little Mickey labels to the top. The kids were really excited about these but I'm not sure the parents were. I don't know that I would use them again for a party for toddlers... OOPS!
 We had the basic food set up~ Hot dogs, chips and salsa, chex mix, some cheesy stuff. Here is a pic of Nic preparing the "Hot Diggity Dogs" and look at what I did with the hot dog ketchup, mustard and relish bottles.
We also played some games. This was an area I had to scrap too. I had planned on making Minnie's BOW~tique, Goofy's obstacle course, Mickey Pavilion and Pluto's bubble bath. Then I realized that there was not enough time and I didn't have enough "extra" adults to oversee these games.

 So, Minnie's BOW~tique turned into Minnie's BOW~la~rama. We didn't have an organized obstacle course but I still had tons of hula hoops to jump through and some other fun things. I didn't get many pics of that but I did get a couple of Donald's Ducks. You know what else I didn't get many pics of? The birthday girl! She had such a good time and would not sit still long enough. I thought I had a good pic with this one but she ran off!
 |
| I could hardly get her to come in for cake and presents |

 This is a pic of her gift table. I made a banner with her name out of glitter paper using my cricut. She loved it because it was so sparkly. I hung it up in her playroom after the party. I made a big cardboard number 3, painted it pink, modge podged and glittered the hell out of it but I totally forgot to hang it up :( I thought I could let someone else use it but then it got ruined outside. Oh well. I had also planned this big Mickey frame using a 10x13 and 2- 5x7 pics cut in circles framed with black glitter paper circles put together like a Mickey Mouse head and maybe even a big bow but it didn't work out. I ran out of time. So what I do with a picture this size?
  I just hung it over the gift table. I didn't want it to go to waste. I mean look at this girl... What a cutie, right?! Her sister is pretty cute too! It was really hot out and she was so new that she was inside for most of the party. She had some cute Minnie mouse ears too. I know someone got a picture of her with them on but I'm not sure who. So, if you have it, please send it my way. Here are some more pics of the party fun!


 |
| Thank You!!! |
Mickey Mouse Clubhouse Birthday (lots of pics)

 |
| Mickey and Minnie favor bags |
 So, I started with the Favor bags. I wish I would have taken a pic of the contents but I didn't think to do that until after they were all gone. They were a big hit! There was a slimy sticky hand thing, Mickey stickers, bubbles, a party horn and a kaleidoscope. I didn't put any candy in the bags because we had candy prizes for some of the games. To make these I used the solid color bags from Hobby Lobby. There are 10 in a pack for $1.99. You could also use a 40% off coupon if you wanted but I didn't. I used my Cricut and the Mickey and Friends cart to cut the head pieces. The ears were cut at 7 3/4 and the bows were cut at 2 1/2 real dial size. The bottoms were just 4x6 pieces of paper and the buttons were 1" circles. I did the same thing with the juice boxes.
 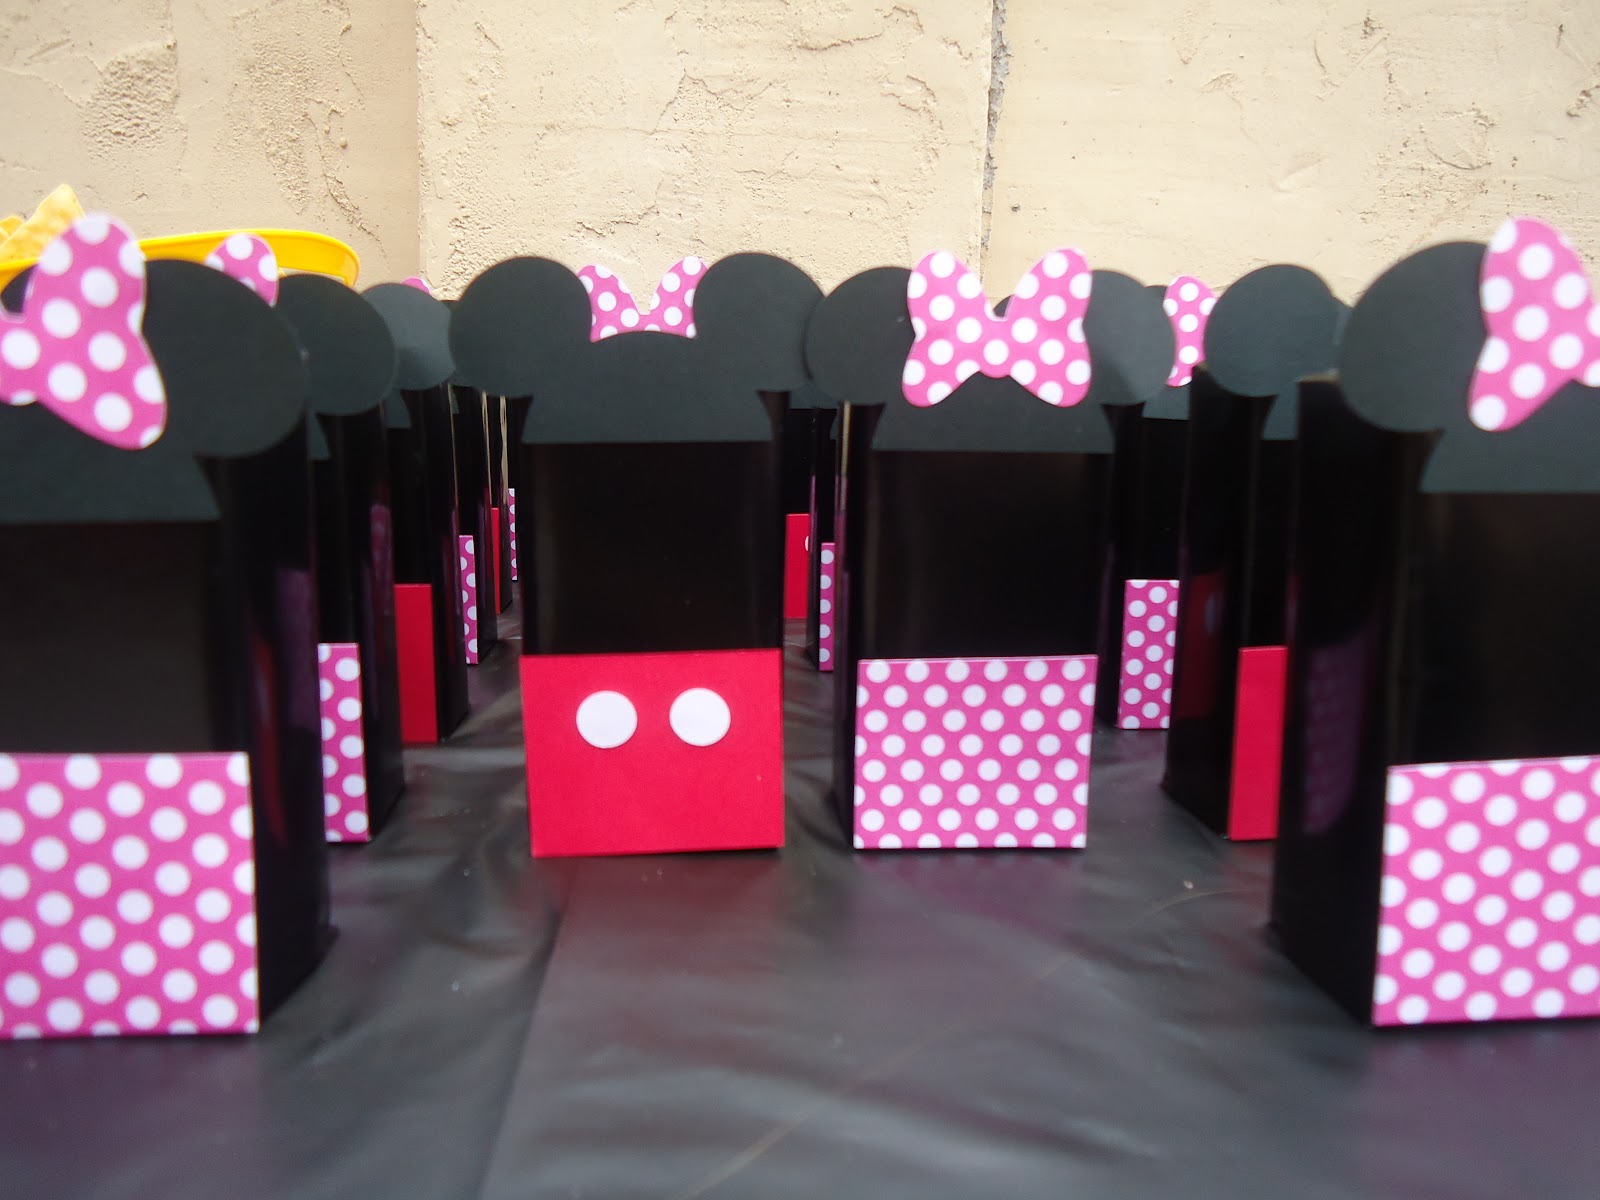 |
| Mickey and Minnie juice boxes |
First I wrapped them in black wrapping paper. (love HL's because there is a grid inside) And used 2" mickey heads but that will probably depend on the kind of juice boxes you use. I used HiC. I think juice boxes are my new thing. I love the way they can be decorated to match any theme. Like these reindeer boxes I made for Olivia to take to school and for a Christmas party last year. I have used different things to reattach the straws but I really think hot glue works the best. Just make sure you are extra careful peeling the straws off so the wrappers are still intact when you go to reattach them.

 I also made a couple banners. I made a basic name banner for the gift table. In pics you can't tell that I used glitter paper but the birthday girl loves all things sparkly! Now it is hanging in her playroom. The one I was really excited about was the Happy Birthday banner. It was so much fun! I used gears in primary colors. They are actually tractor wheels but there is a very similar image in the shapes file of SCAL. I used the Mickey Font cart for the letters but you can download this from dafont. I think it's called Minnie. The hands were cut from Mickey and friends. I attached them with little red brads. I normally use ribbon but that didn't seem to work for the gears. This way they kind of look like they are moving together.
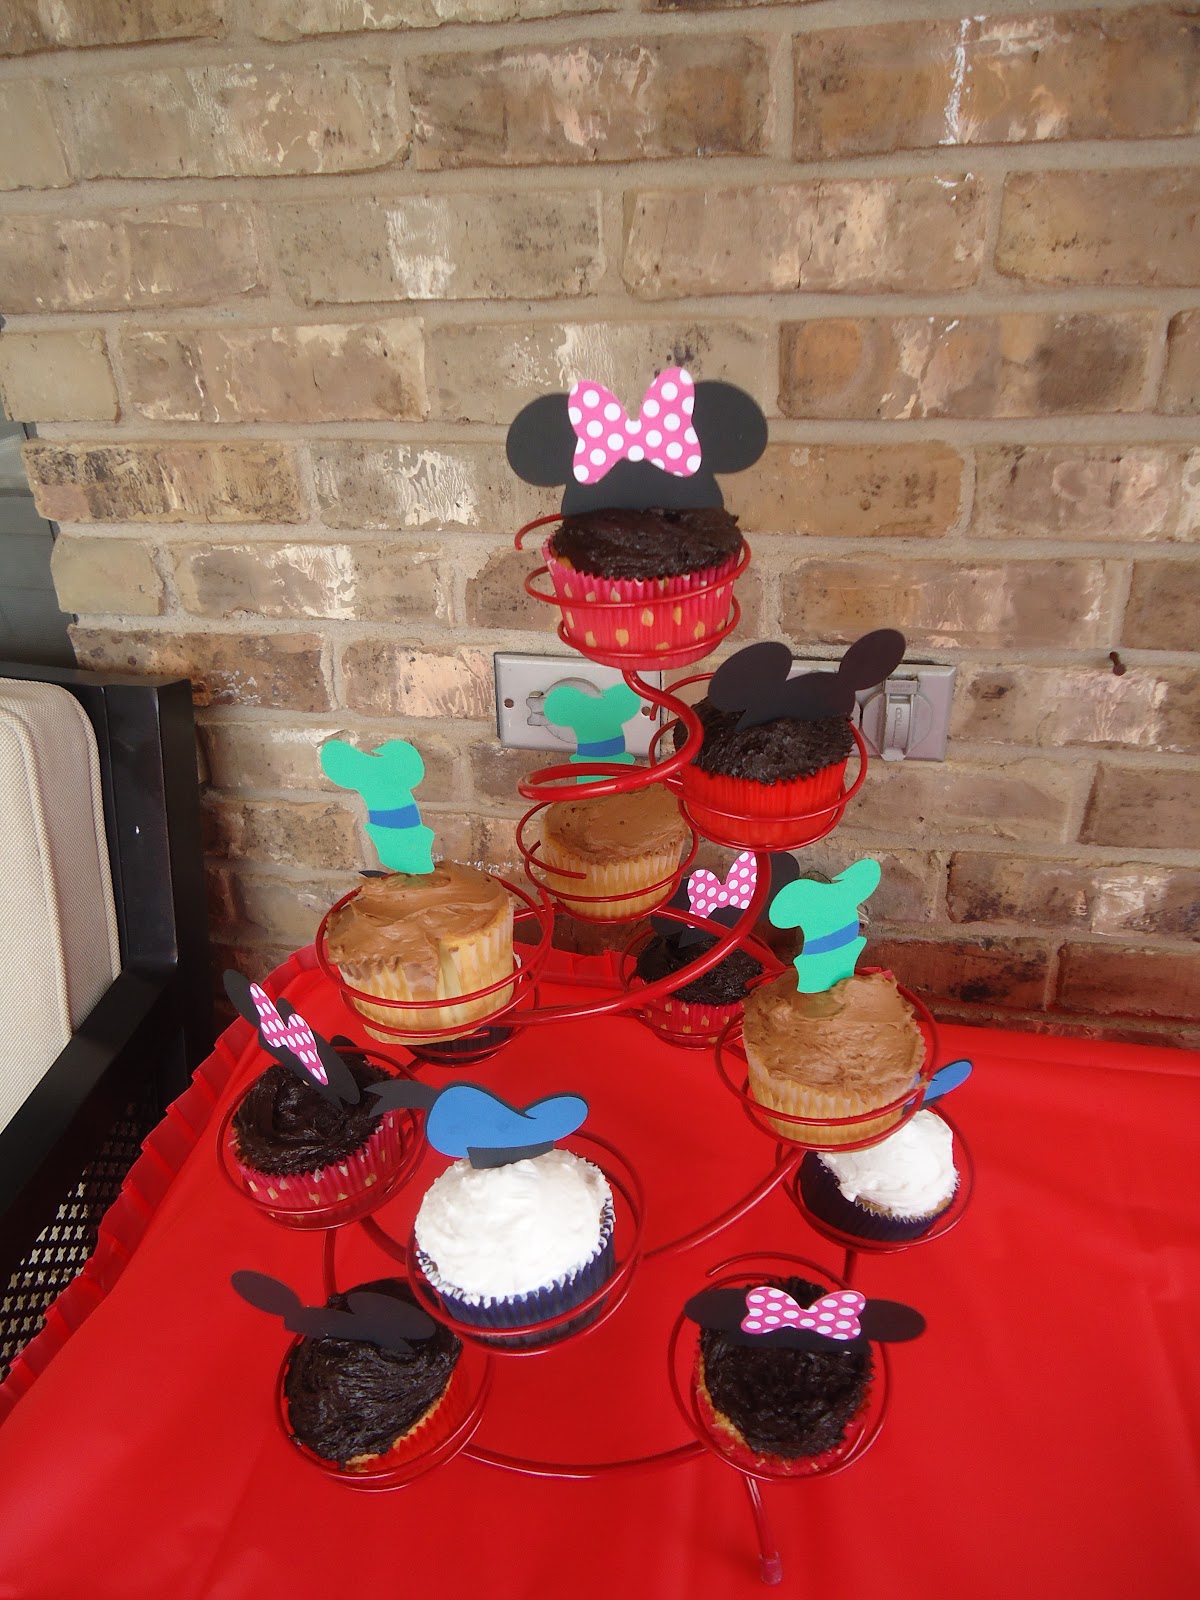
I have a some other projects I did and a whole bunch of pics to share so I'll just post them here
Sunday, February 19, 2012
Very Hungry Caterpillar cake

This is a cake I made for a friend last month. I actually pinned it with no one specific in mind. I already have a theme for Olivia's party this year but I just thought it was super cute! Anyway, a friend of mine saw the cake and asked if I could make it. At first I was really intimidated but I decided to give it a try. It ended up being one of my most fun cakes and I'm sure I'll end up doing it again. It's far too early to start planning birthdays for next year but I have a feeling the Very Hungry Caterpillar will be a top contender.
 I just used the image from the book's cover as a guide and cut a shape out of parchment paper that looked like the caterpillar. I made the head seperately so it could also be used as the smash cake. Since it is covered in fondant I think it might be hard for a baby to dig into. For the body I marbled different shades of green fondant by using green (of course) black, blue, yellow and white colored fondant. I even used a little green luster dust on a few of the pieces. I didn't want to go crazy with the shimmer because it was for a little boy but for a girl I might glitter it all up ;)
 The head is covered in red fondant and the eyes were just cut free-hand. The legs, antenna and lining look really dark but it is actualy chocolate fondant. I think it tastes pretty good... especially compared to the regular fondant. The dots were cut out using the bottom end of a wilton icing tip and the board is covered in white fondant. This cake took SO much fondant. I usually decorate cakes with buttercream and add fondant accents so this was a little different for me. Overall, I am really happy with the way it turned out and my friend seemed really pleased too. This last pic was taken when I had just finished it before I put it into the cake box. I added a little cupcake for the birthday boy but this pic just has an empty cupcake liner. So what do you think? Is the Very Hungry Caterpillar a good theme for a party or what?
***update: I didn't add any links in this post. I'm working on how to remove them but the links you see are ads so don't click on them.
Subscribe to:
Posts (Atom)